

12 April 2012
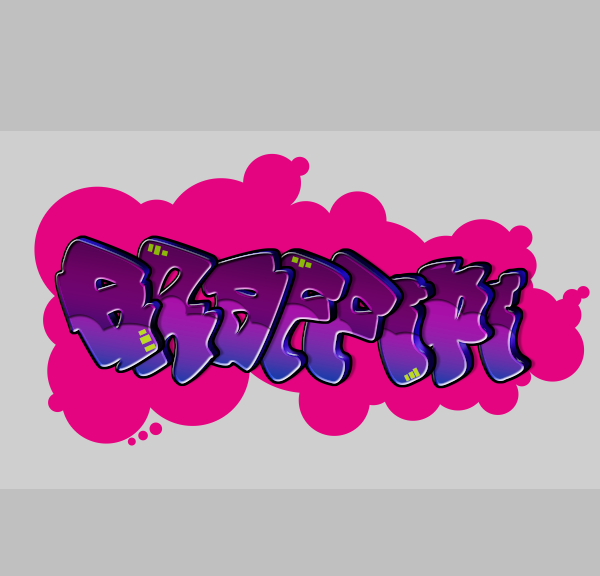
Create A Cartoon Style graffiti text In photoshop
Learn how to create graffiti text from scratch in Photoshop! This tutorial will show you how to use layer styles and finish the effect with a vector-style brick background.

Download the PSD
Graffiti Text.zip | 16.32 MB
Download from Website
Graffiti text effect tutorial
Resources
Star Brushes - QBrushes
Step 1- Create a New Document
Create a new 1000x500 pixels document. You can do this by going to File > New.

Step 2
With the background layer selected, use the Paint Bucket tool to fill the layer with #D0CFCF.

Step 3 – Text
Now for the text create a new layer, you can go online and find a font that would best fit your design or for my tutorial I created a rough sketch of how I wanted my text to look and scanned it into my computer. Next, grab your pen tool and make one of the letters. I used the word "Graffiti".

Step 4
Make a selection from the work path (right-click>Make selection) fill it with any color for now

Step 5
Rename this layer. In my case I named this layer "G". Duplicate this layer, place this layer underneath the regular layer. Double click this "G Copy" layer so that it brings up the Layer style box and change the color.

Step 6
Then move the "G copy" layer upward 5px by using your arrow keys and also move it 8 or 9 pixels to the right.

Step 7
On the original "G" layer add these layer styles, lets start with the Inner Shadow


Step 8
This is how it should look so far. Go to your "G copy" layer, once you have selected this layer go to Layer>Layer Style>Create Layer. Now select your Burn tool and darken in some areas. Once you have finished that take your Dodge tool and highlight certain parts. Note: The green circle is where I used the Burn tool, the red circle is where I used the Dodge Tool.


Step 9
While the "G copy" layer is still selected add a Drop Shadow.

Step 10
Create a new layer and on the "G copy" layer make a selection of it and add a Stroke. Edit>Stroke, place this stroke layer beneath the "G copy" layer.

Step 11
Create a New Layer and rename it "Squares", grab your selection tool and make some squares fill it with #8cb809

Step 12
Now we will add the highlight, create a new layer and with your pen tool create the place for the highlighted area. Fill it with #FFFFFF

Step 13
Erase the unnecessary areas. To do this make a marquee selection of the original "G" and "G Copy" layer (while holding the ctrl+alt key, select the box next to the layer's name) Select>Inverse, then delete while the highlight layer is still selected.

Step 14
Change this layer to 'Soft Light' and add this layer style (Layer > Layer Style > Inner Shadow).

Step 15
Repeat these same steps for the rest of your letters


Step 16 Cloud
Create a New layer and rename it "cloud". Place this layer beneath the letter layers. Grab your brush tool and use different sizes of circles to create the cloud. I used the color #e40480. Once finished duplicate this layer
Step 17
Add these layer styles to the original layer (Layer > Layer Style > Bevel and Emboss).


SHARE THIS POST


